Levels
Introduction
Levels at work
When you have created a Plating/Greeble Object using a Non Destructive Workflow, you can add extra levels of plates or greebles. For each level, you can then choose to either build on top of the original object or previous levels. They are similar in concept to layers in Photoshop or Gimp.
Levels at work
This can give rise to new and interesting combinations of effects which you can then save as a Preset for future use.
Warning
With Great Power…
Add levels with caution!
Adding more than 3 or 4 levels will add more computation, so Blender’s processing will slow down accordingly and may appear to freeze.
New levels are disabled by default to prevent Blender automatically re-calculating the moment a level is added.
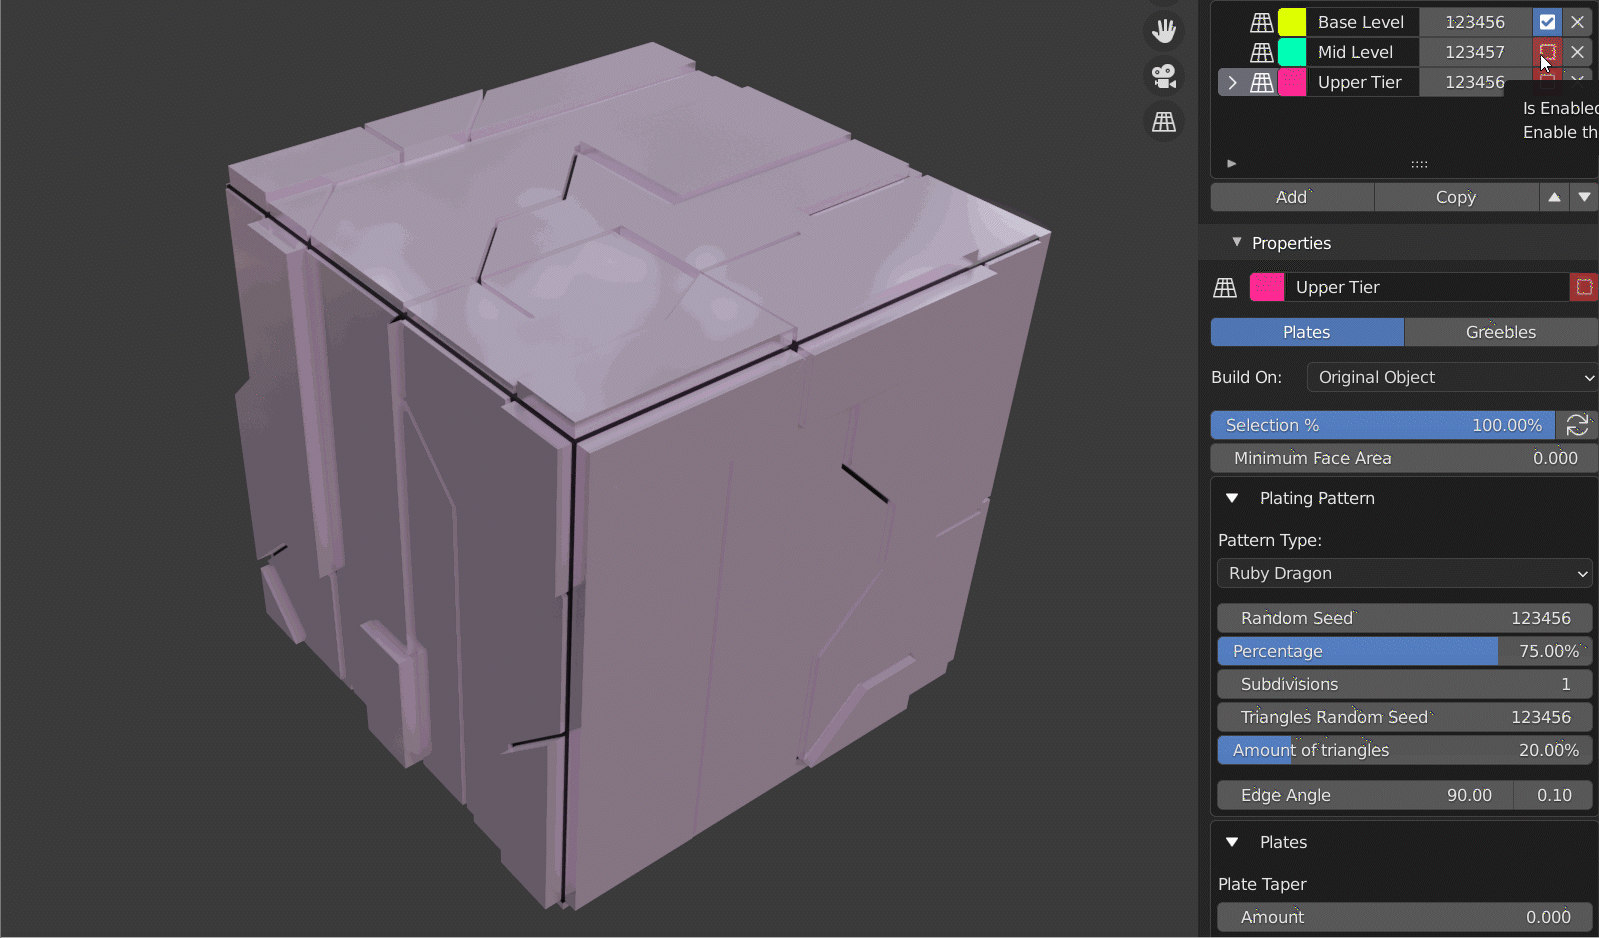
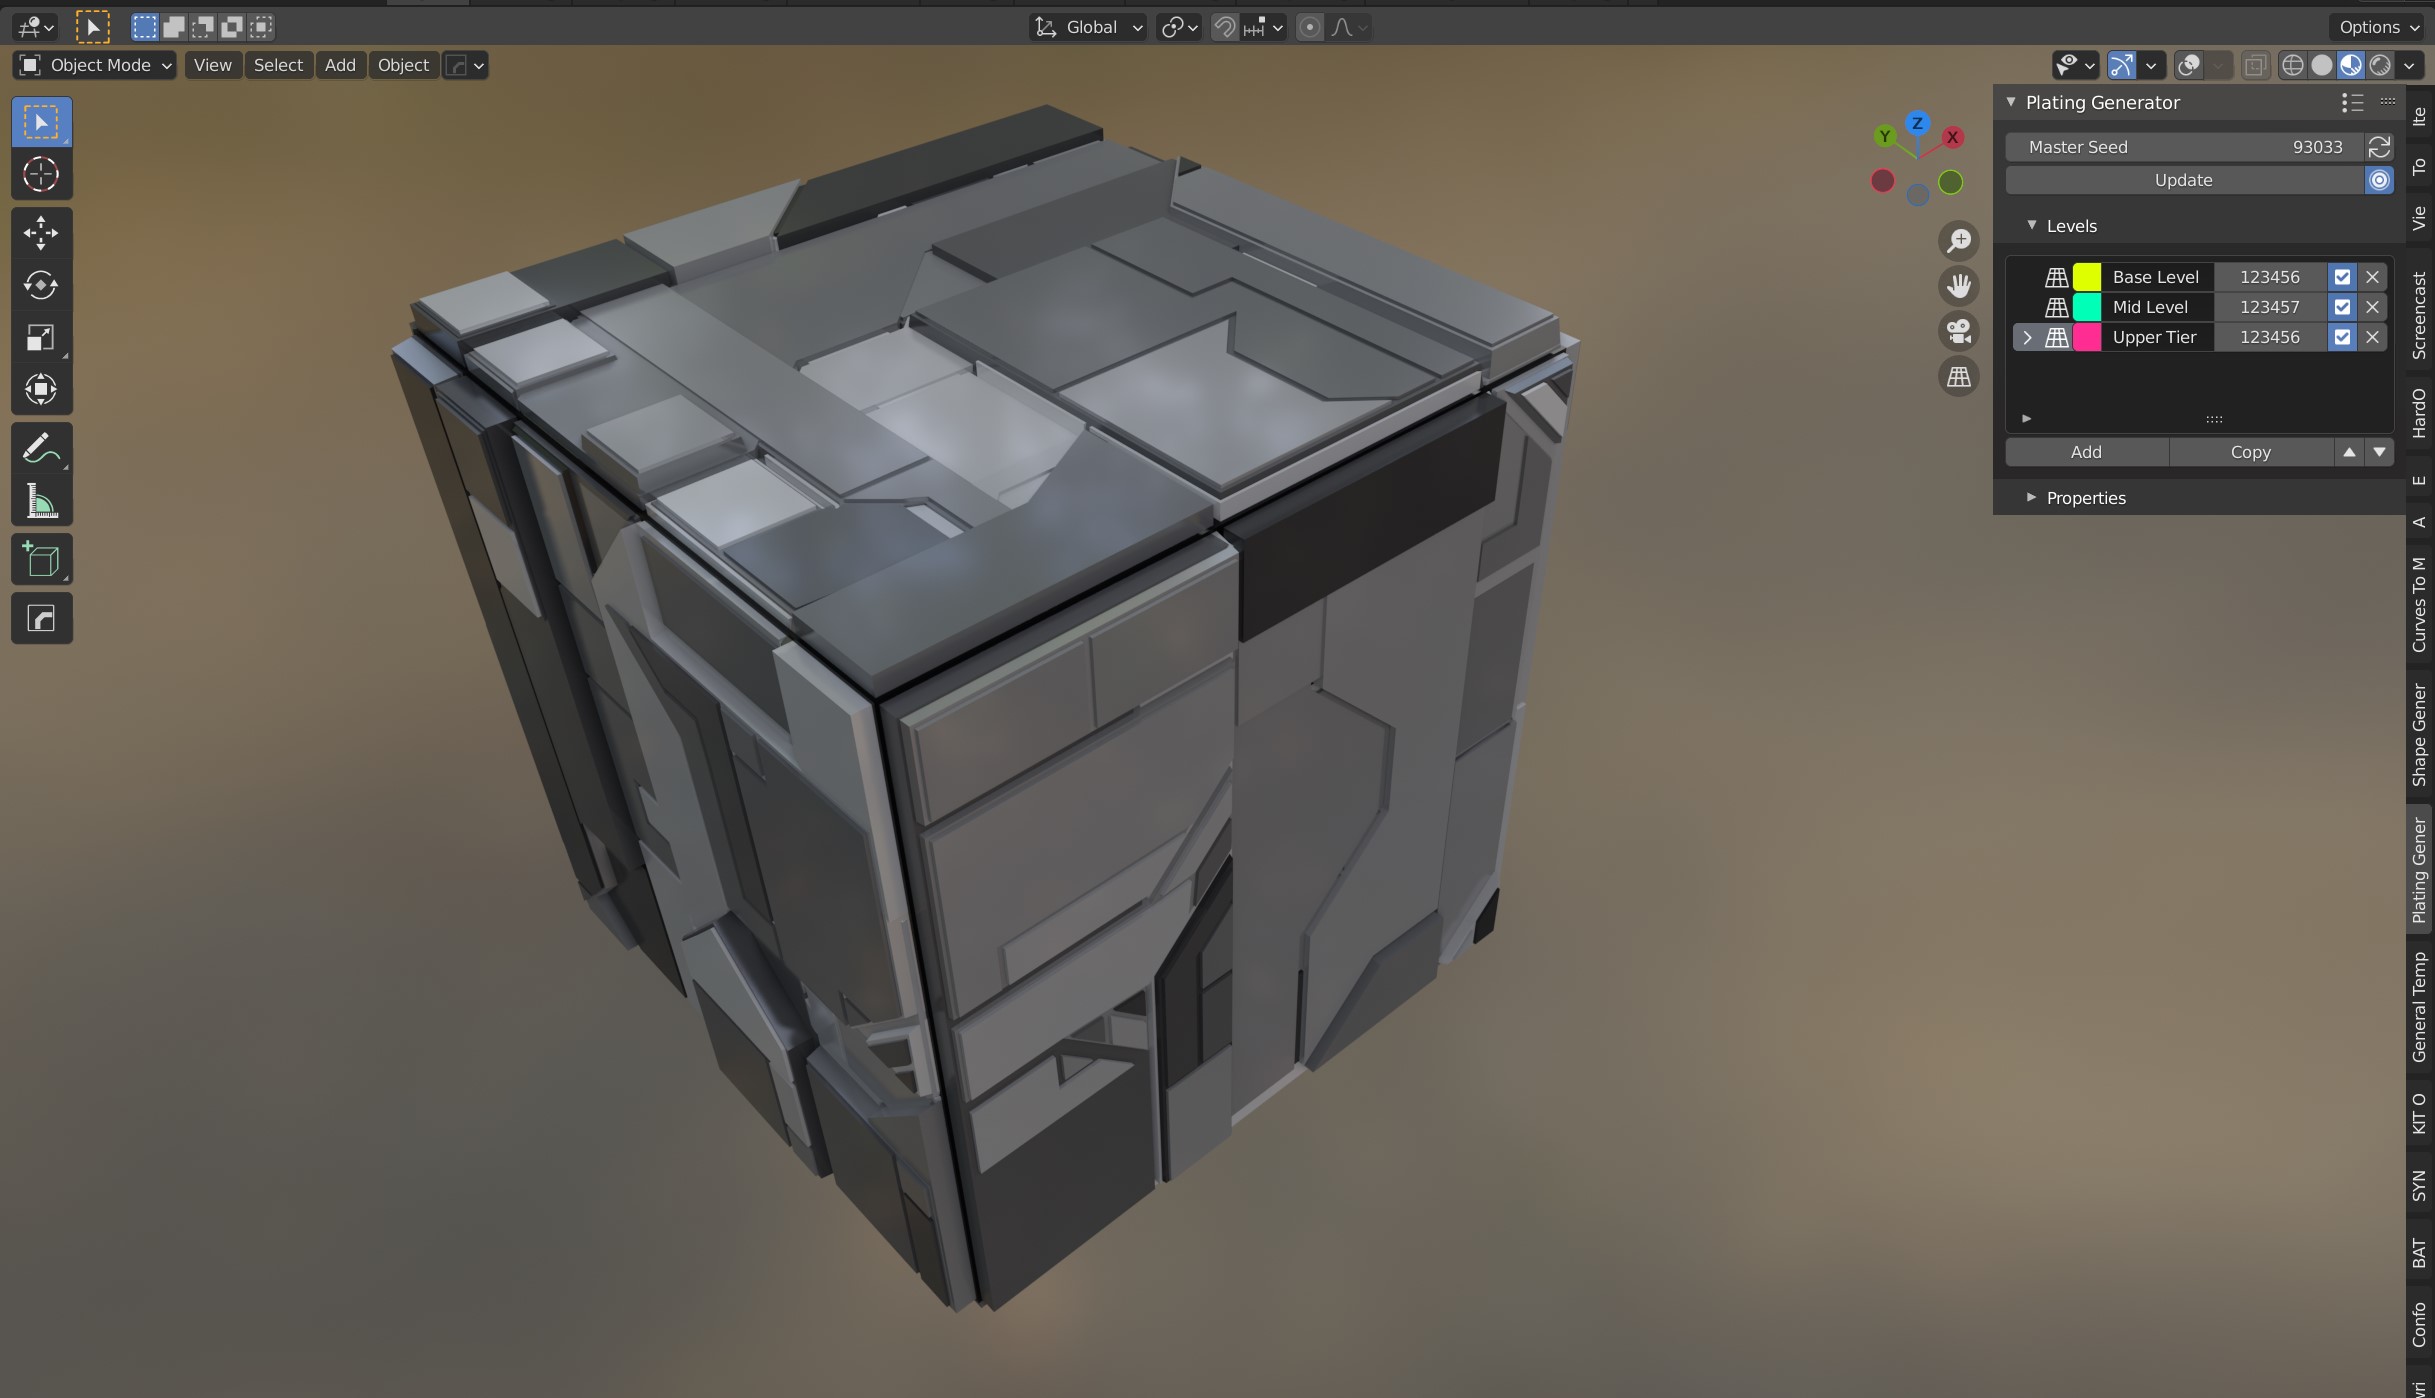
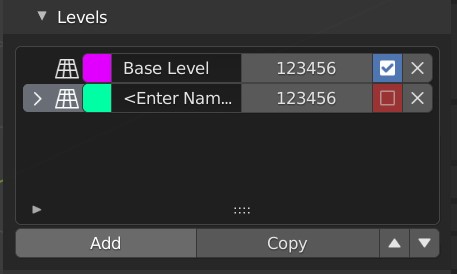
Levels Panel
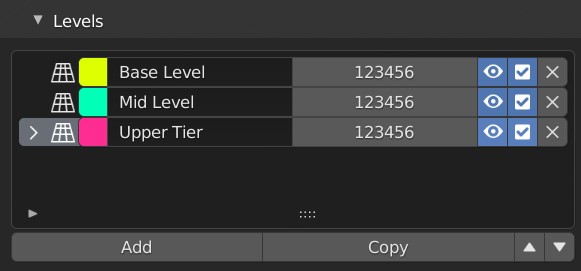
Levels Control Panel, with some example levels. Here, the ‘Upper Tier’ level is selected.
Add: Add a new Level.
Copy: Make a copy of the selected level.
Up/Down Arrows: Move the selected level up and down the stack.
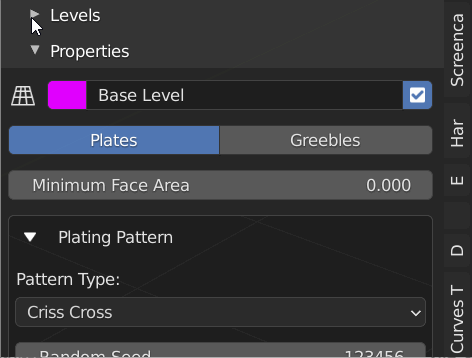
Expanding the Levels sub section will give you the ability to add new Levels to the plating object. When you first add a new Plating Object, a single level called “Base Level” is added:
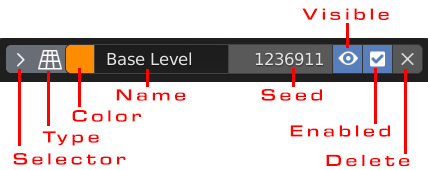
Controls for each level.
Selector: By clicking on a level, the row will be highlighted and you will be able to access the properties below the panel.
Type: Icon showing the type of level (Plates or Greebles)
Color: A random color is assigned to a level for organisation purposes which you can change if you wish. It has no effect on the object.
Name: Name for the level.
Seed: The seed associated with the level.
Visible: Whether we can actually see the level of not: It will still be processed if it is enabled. This helps with adding invisible framing elements for greebles or plating.
Enabled: Whether the level is enabled for processing or not. If other levels are dependant on this level, they will no longer be displayed or processed.
Delete: Delete the level from the plating object.
Use
To add a new Level, with the plating object selected:
Expand the Levels sub-section of the panel:
Click the “Add” button to create a new Level:
By default the Level will be disabled allowing you to set up some properties before you add a new Level.
In the Properties panel, try changing the type of Level to “Greeble”:
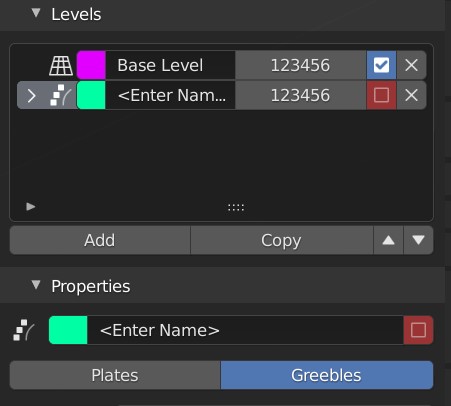
Now, enable the Level by clicking the checkbox either in the Properties panel or in the Levels panel. You should see the object update with the new Level, unless it is hidden by the objects in the other Level:
Building on other Levels
The Build On option allows you to choose whether the level builds on the Original Object or Previous Levels:
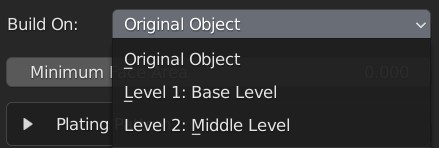
If you select a previous level, and that level was a “Plating” type, you can choose whether to add this level to the Tops or the Sides of the Plates (or both by pressing the shift key):

Selection
The Properties section allows you to further configure a selection:
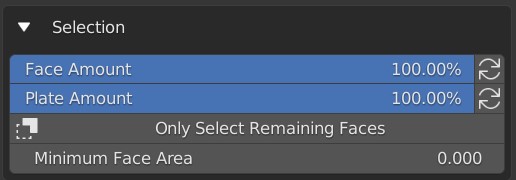
You have the following selection options when you are either building on the original object, or on top of a level:
Face Amount: The percentage of faces from the selection to build on. On the original object, this will randomly select faces. Clicking the circular refresh button allows you to randomize the selection.
Plate Amount: The percentage of plates or greebles to build on. On the original object, this will randomly select existing plates. Clicking the circular refresh button allows you to randomize the selection.
Only Select Remaining Faces: Only pick from the faces that haven’t already been used by the levels below. Useful for keeping the effects from overlapping.
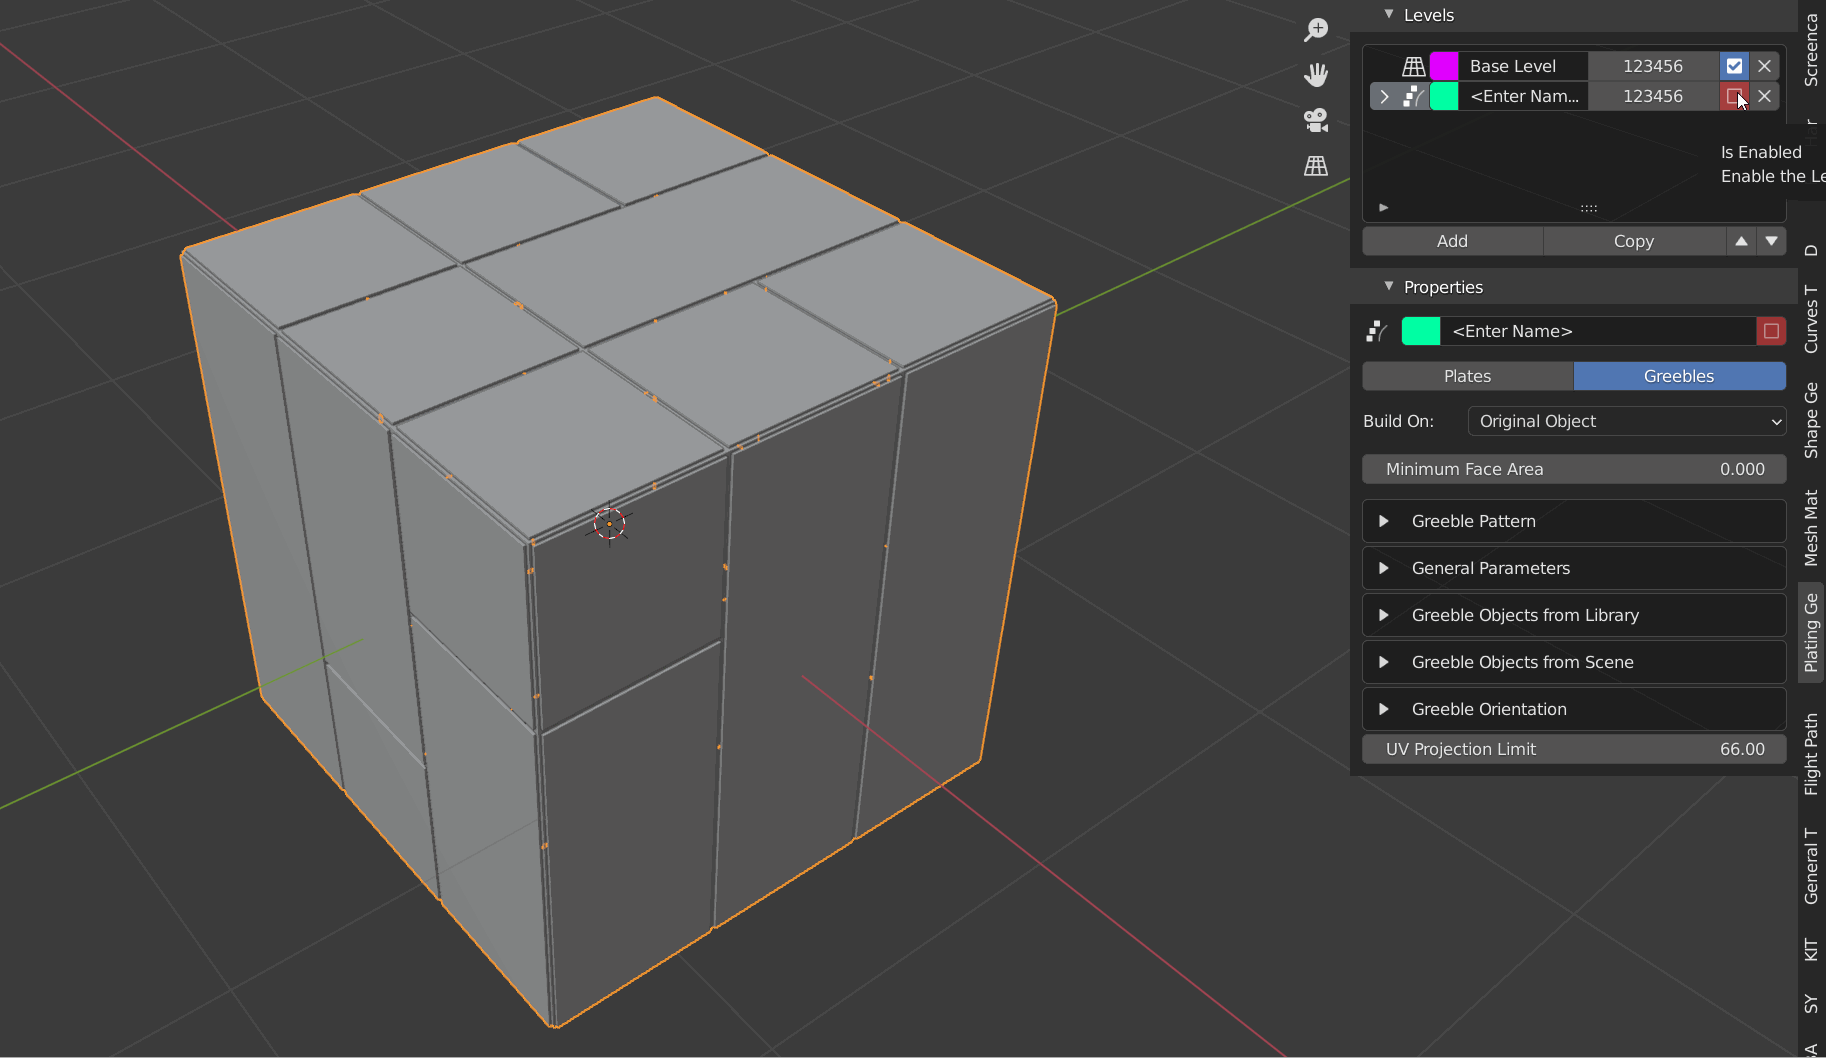
You can control the minimum size of the faces that will have the Level applied by using the Minimum Face Area property, which is useful for stopping plates or greebles being added to very small faces.
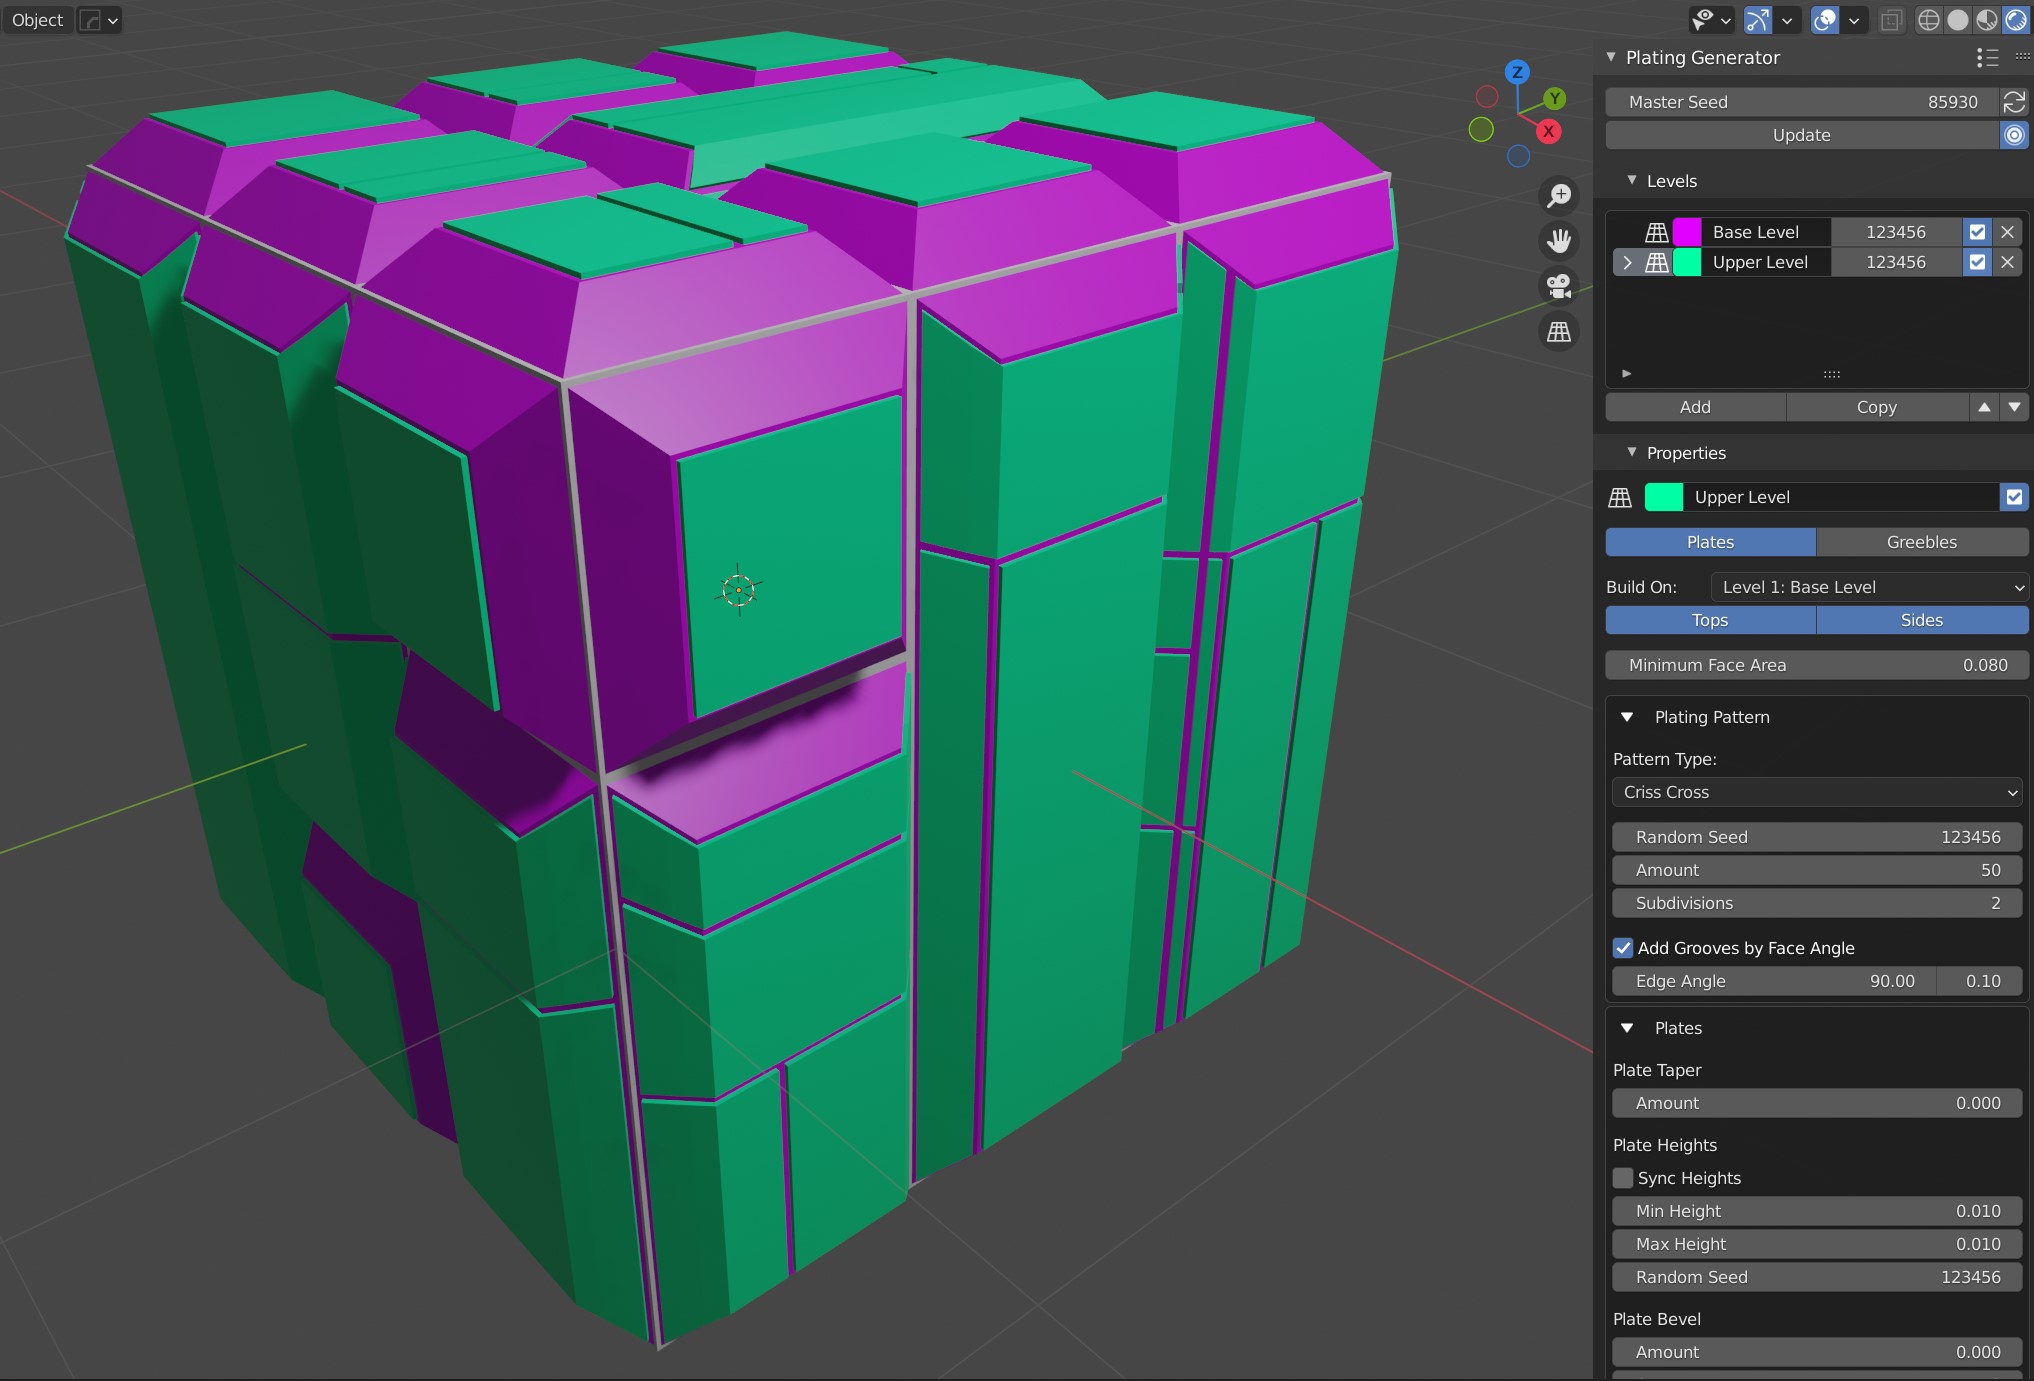
Here, one plating level is being built onto another, with the green level being applied to the tops and sides of the base purple level. The Minimum Face Area property is used to stop the effect being applied to smaller faces (such as some of the smaller sides).
Changing Other Properties
When you click a level, it gets selected and the associated Properties appear in the panel below it:

Each of the different properties are described in this section.